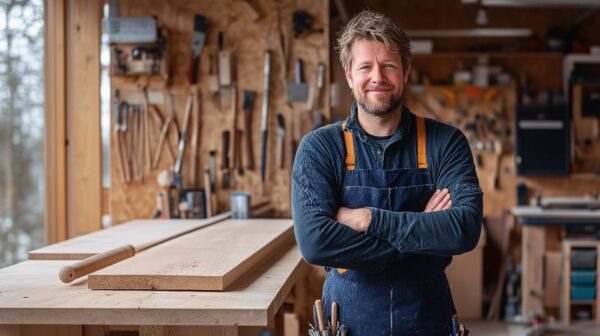
For artisans, crafters, and DIY enthusiasts, sharing your work with the world can be as rewarding as creating it. Whether you sell your projects at craft fairs, through an online store, or simply want to display them on social media, presentation is key. A well-crafted piece deserves an equally impressive showcase. Richard R Wilk shares practical tips for photographing your creations and effectively sharing them to draw attention, customers, and admiration.
Why Presentation Matters
In today’s visually driven world, the way you present your creations determines how they are perceived. Quality photography and thoughtful sharing can elevate your work, build your brand, and attract more buyers. A stunning photo tells a story, evokes emotion, and showcases the time, effort, and craftsmanship you’ve invested in your piece.
How to Photograph Your Projects
1. Use Natural Lighting
Good lighting is the cornerstone of great photography. Natural light, especially in the morning or late afternoon, is ideal for capturing your projects. Harsh midday sunlight can create unwanted shadows, while artificial lighting might distort colors. Set up near a window with indirect sunlight, or photograph outdoors on a cloudy day for evenly diffused light.
2. Choose a Clean Background
The background should complement, not compete with, your project. Neutral tones, such as white, gray, or beige, work well for most creations. For smaller items, consider using a lightbox, which eliminates distractions and highlights details. If your piece is large, like furniture, choose a simple outdoor or indoor setting that matches the style of your creation.
3. Focus on Details
Close-up shots are essential for highlighting intricate details, textures, and craftsmanship. Use the macro mode on your camera or smartphone to focus on specific elements. For example, if you’re showcasing a wooden table, capture the wood grain, dovetail joints, or the sheen of the finish.
4. Experiment with Angles
Take photos from various angles to showcase the entire piece. Include a front view, side view, and an overhead shot. If applicable, show your creation in use—for example, a handmade chair placed at a dining table or jewelry worn by a model. Lifestyle shots help potential buyers envision how your product fits into their lives.
5. Edit Thoughtfully
Editing can enhance your photos but should be used sparingly to maintain authenticity. Simple adjustments like brightening the image, increasing contrast, or tweaking the white balance can make a big difference. Use editing apps like Lightroom or Snapseed to refine your images while keeping them true to the original.
Sharing Your Projects Online
1. Choose the Right Platforms
Each platform has unique strengths for sharing your work:
- Instagram is ideal for visual storytelling. Use a combination of carousel posts, reels, and stories to engage your audience.
- Pinterest is perfect for driving traffic to your website or online store. High-quality pins can attract users seeking inspiration or handmade items.
- Facebook works well for building a community and promoting local events like craft fairs.
- Etsy or Shopify are must-haves if you want to sell online, offering built-in tools to showcase your work and connect with buyers.
2. Write Engaging Captions
A compelling caption complements your photo. Share the story behind your creation—what inspired it, the process involved, and any challenges you overcame. Use hashtags relevant to your niche to reach a broader audience. For example, if you’re a woodworker, include tags like #woodworking, #handmade, and #craftsman.
3. Show Behind-the-Scenes Content
People love to see how things are made. Sharing behind-the-scenes photos or videos of your workspace, tools, and process adds authenticity and builds a connection with your audience.
4. Engage with Your Audience
Respond to comments, answer questions, and show appreciation for those who support your work. Engagement builds loyalty and helps foster a community around your creations.
Promoting Your Work at Craft Fairs
1. Create a Visually Appealing Display
Your booth is the first thing customers see, so make it inviting. Use stands, shelves, or tiered displays to showcase your projects at different heights. Add banners or signs with your name, logo, and contact information.
2. Offer Quality Photos
Even at craft fairs, having printed photos of your work can be helpful. Display images of custom or past projects that aren’t currently available to give potential buyers a sense of your range.
3. Share Your Story
People often buy handmade goods because of the personal connection to the creator. Be ready to talk about your journey, process, and inspiration. Consider creating a small booklet or flyer with your story and contact details.
4. Provide Social Media Handles and Business Cards
Encourage customers to follow you online by including your social media handles on your business cards, tags, and signage. A QR code that links directly to your online shop or portfolio can be a helpful addition.
The Importance of Consistency
Whether you’re sharing your work online or at a craft fair, consistency is key. Ensure your branding—logos, colors, and messaging—aligns across all platforms and materials. Consistency builds recognition and trust, making your work more memorable to potential buyers.
Photographing and sharing your projects effectively can transform your passion into a thriving business or a source of pride. With the right techniques and platforms, you can showcase your creations in their best light, connect with a wider audience, and build lasting relationships with customers. Remember, every piece you share is a reflection of your dedication and talent, so invest time in presenting it thoughtfully.
Now, grab your camera, refine your booth, and let your work shine!
